For beginning photographers, finding the right digital camera can be a chore. With so many point-and-shoot models and brands, all at varying price points, shopping can be confusing. Sort out the confusion by reading answers to these 10 common digital camera questions in our digital camera FAQ.
1. How Much Resolution Do I Need?
Most of the newer digital cameras have plenty of resolution for beginning photographers to make reasonably sized prints, which means the maximum resolution in a digital camera isn't as important as it used to be. Although resolution amounts are important in determining image quality, keep in mind that all digital cameras of a particular resolution aren't going to yield the same image quality. Lens quality, image sensor quality, and response times of the camera all affect image quality, too.
2. What Is the Cost of Printing Photos?
For the most part, printed digital photos are similar in cost to printed film photos, averaging 15 cents to 50 cents per print, depending on size.
Although it might seem as if printing photos at home is very inexpensive, you do have to remember the cost of ink and paper, and that cost can increase quickly if you use specialty inks or papers, made specifically for photos.
Some stores allow you to print photos from a kiosk, simply by inserting a memory card. You also can send your photos to various companies on the Internet, where they can be printed and either sent to you or picked up on location. In most instances, printing photos at a store is less expensive than printing at home.
3. What Do the Zoom Lens Numbers Mean?
The zoom lens measurements for a digital camera signify the amount of magnification the lens can produce. The numbers can be confusing, however, because some manufacturers highlight different measurements, including optical zoom, digital zoom, and combined zoom. Keep this in mind: Optical zoom is the most important zoom measurement because it measures the focal length of the lens.
For more information on zoom lenses, click here.
4. Why Does My Camera Have a Delay When I Take a Photo?
When using auto-focus mode, your digital camera may need a fraction of a second to focus on the image. In low-light conditions, this delay, called shutter lag, can last a full second or more, which could cause you to miss a spontaneous photo or which could cause blurry photos, if you can't hold the camera steady during the shutter lag. When large zoom lenses are fully extended, shutter lag increases. Most point-and-shoot models allow you to pre-focus by pressing the shutter button halfway before taking the shot.
When using a flash, you may experience shutter lag, too, because the camera's focus-assist light needs to fire to allow the camera to focus before it fires the main flash.
5. Why Does My Camera Have a Delay After I Take a Photo?
Such delays, called shot-to-shot delays, occur when the camera must transfer the image to the memory card and clear the sensor before shooting another photo. You can overcome shot-to-shot delays by shooting in burst mode, where the camera snaps several photos at a preset image size within a couple of seconds.
6. Is Image Stabilization Important?
Image stabilization, sometimes shortened to IS, helps prevent blurry photos from camera shake. IS can be optical, digital, or dual. Image stabilization is especially important for cameras with large zoom lenses.
Optical image stabilization is the best type of IS because it involves actually moving the parts of the camera to compensate for camera shake. Many recent point-and-shoot models now contain IS, although not all of them offer optical IS.
For more information on IS, click here.
7. Will Certain Types of Memory Cards Increase Transfer or Performance Speeds?
Memory cards, for the most part, all perform at similar levels, especially with beginner, point-and-shoot digital cameras. Some memory cards are labeled as "professional" or "high speed," but, with point-and-shoot cameras, you won't see enough of a performance boost from such memory cards over standard memory cards to justify the higher cost.
8. Are Image Quality Settings Important?
With almost every point-and-shoot digital camera, you can set various aspects of the image, including resolution and quality. Resolution refers to the number of pixels in the image. Quality involves the amount of compression used on the photo.
Images with more compression and fewer pixels will have less overall image quality, requiring less storage space. Images with less compression and more pixels will have more image quality, but they will require more storage space. Because memory is so inexpensive these days, you'll rarely want to shoot at settings that results in low image quality. Once a photo is shot, you can't go back and add pixels, after all. Images that you plan to print should be of a high image quality.
9. What Type of Battery Is Better?
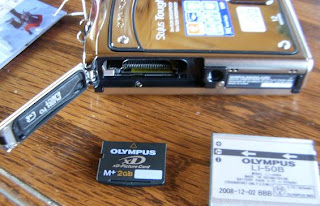
Point-and-shoot digital cameras typically use either proprietary rechargeable batteries or disposable off-the-shelf batteries. Both types have some advantages.
Proprietary rechargeable batteries cost less to use in the long run, but, once their power is gone, your camera is useless until you can recharge. You can buy a second, backup battery, but it can cost $40 or more.
Disposable batteries typically add more bulk to the camera, and they're more expensive in the long run because they sometimes run out of power quickly, especially if you use the LCD quite a bit. However, if you're traveling and run out of power, picking up two more AA batteries at a local store is an easy process. You also can use rechargeable AA batteries.
10. Which Digital Camera Should I Buy?
The final question is one that, unfortunately, has no specific answer. The right camera for you likely isn't the right camera for your best friend. Everyone's photography needs are a little different.
The best way to figure out which digital camera you should buy is to do your homework. Determine how you'll use the camera, search for a model that has strengths you want, talk to family and friends
Software Programs.
* Photoshop Elements, which runs on both Macs and Windows, is worth investigating. Have at least one computer set up with Elements and such plugins as PhotoGraphicEdges to fix up the images.
* Consider having pictures printed locally at a one-hour processing center; it's less expensive and produces much better quality than using ink-jet printers. In our area, I pay reprint prices of 29 cents for a 4-inch by 6-inch print, and bring the images to them after burning just the ones we want on a CD-ROM. Make sure photos are cropped to the 4-inch by 6-inch ratio before taking them to be printed.


